Sunday, January 19, 2014

Kitchen/Dining Timelapse: July 2013 - January 2014

This is probably long over due as we haven't worked in the kitchen for months. It's essentially done although we still need to install some crown molding, the tile backsplash and a few light switches. We also need to add some frames to the walls but it hasn't been a priority. Other than that it's finished and we are LOVING the improvements!

The following photos are all taken from the same location. 

July 2013:

Fall 2013:

January 2014:
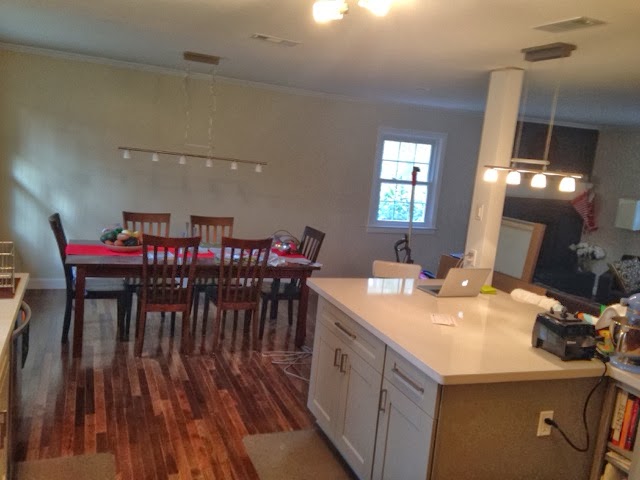


These two are taken from almost the same spot where the dining table sits. 

Fall 2013:

January 2014:

The above picture was taken from about the same location as the old doorway that separated the kitchen from the dining room seen below:


Saturday, January 18, 2014

Main Bathroom Update: January 18, 2014

Shower/tub area is tiled but needs to be sealed and grouted.


Walls are primed and ceiling is painted. Half of the crown molding is installed. 


Floor has been leveled and floor tile placement has begun! 


Still no toilet, vanity or new lights. Oh and the tub is still blue. 

Wednesday, January 8, 2014

Main Bath Renovation

When we moved in our house had essentially two full bathrooms, although the one in the basement was icky and we decided that we didn't need to us it until it was redone. The tentative plan was to redo the basement bathroom before demoing the main bathroom so that we wouldn't be without a functional bathroom. A few months after moving in we have essentially one half bath on our way to having 2.5 baths. We're using the toilet and shower in the basement, sink in the kitchen, we have a framed in half bath with rough in plumbing and a demo'd main bath that can't be used for any normal bathroom activities. 

Here are some photos of the main bath:

Before:


Bathroom in a Dumpster:

More Demo:

Reconstruction Begins:


Wednesday, December 4, 2013

Living Room Fireplace Upgrade

You probably hadn't noticed that we have a fireplace in our living room because most of the pictures we post are taken from the same corner where the fireplace sits, thus you can't see it. Anyway, the chimney is large and brick and was painted a color very similar to the wall color and then on top of the brick was an out of place mantle and a brass ash screen. This was not working but was not ( and probably still shouldn't be) a priority as there is still so much to do at the house. But when Kelly started to get out the Christmas decorations we realized that this fireplace just wouldn't do,especially since the fireplace is such a key location for Christmas decorations. Not sure when the fireplace upgrade will be thoroughly completed ( still need to change out the mantle) but we want to share a brief update on the upgrade. And we'll probably post again to follow up with the finished product.

Before:

Current:


Happy holliday decorating to you!!!


Here's the mostly finished (aka finished for now) fireplace:


Monday, November 4, 2013

Saturday, October 12, 2013

Adventures Without A Box Truck

Today was both victorious and sad. That's right folks. We sold the box truck. We successfully bought a box truck in California, fixed it up a bit with blood sweat and money, stored all of our belongings in it for 6 weeks, moved across the country, completed 2 dump runs, delivery of 700sf of hardwood flooring, drywall deliveries, sold the truck, and net spent less than the cost of gas to move across the country. Not bad.

Our beloved box truck will soon be on it's way to Honduras with a family that owns a small hardware store. 

 ¡Adios Box Truck!


Wednesday, October 2, 2013

Privacy Glass - Quick DIY Project

The shower in our main bathroom (the totally blue bathroom that will be remodeled before we are done with this house) has a window right in the middle.  The natural light is great and our backyard is big and jungle like so it's a great view. However across our backyard and through the jungle are other houses. As winter approaches many of the leaves will drop and the backyard ought to thin out. The window is placed a bit low so we decided to frost the bottom pane of glass. Great idea! We are very pleased with the final product. 

Before:

After:


This look was easily achieved by cleaning the glass, taping off the frame and using a frosted glass spray paint. We used a Rustoleum product but there are several options available.